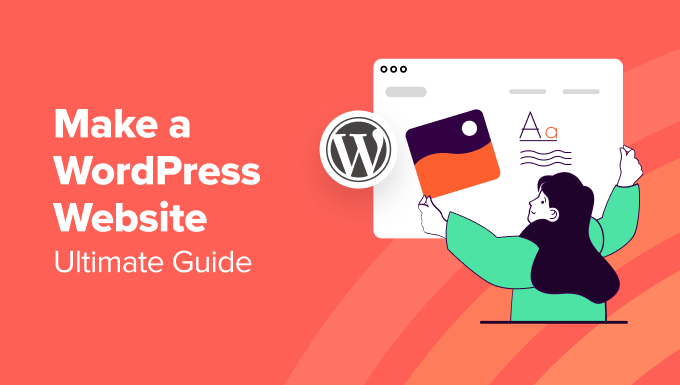
Want to establish your online presence in India in April 2025? Creating a website might seem like a complex task, but with WordPress, it’s surprisingly accessible, even for beginners. I’ve guided many individuals through this process, and I’ve seen firsthand how rewarding it is to build your own website. This guide, tailored for beginners in India in April 2025, will walk you through every step, ensuring you have the knowledge and confidence to get your site up and running. Let’s dive in!
Understanding WordPress: Two Main Options
Before we begin, it’s important to understand the two primary ways you can use WordPress:
General shopping ads
- WordPress.com: This is a hosted platform, similar to renting a website space. WordPress handles the technical aspects for you. It’s simpler to start but offers less flexibility in terms of customization.
- WordPress.org (Self-Hosted): This involves downloading the WordPress software and installing it on your own web hosting. This option provides much greater flexibility, control, and is generally recommended for building a professional website with long-term goals. This guide will focus on WordPress.org.
Step 1: Secure Your Domain Name and Web Hosting
Think of your domain name as your website’s unique address (e.g., yourwebsite.in or yourwebsite.com) and web hosting as the server space where your website files will reside, making them accessible online.
- Choose a Domain Name: Your domain name should be memorable, relevant to your website’s content, and easy to spell and pronounce, especially for your target audience in India. Consider using .in for a local focus or .com for a global reach. Brainstorm a few options and check their availability through a domain registrar (like GoDaddy, Namecheap, or local Indian providers like BigRock or HostGator India). I’ve spent considerable time helping people find the perfect domain name – it’s a crucial part of your online identity!
- Select a Web Hosting Provider: You need a hosting provider to store your website files and make them accessible on the internet. For beginners in India in April 2025, shared hosting is often the most affordable and suitable option. Look for hosting providers with servers located in India for faster loading times for your local audience. Popular hosting providers with a strong presence in India include Bluehost India, HostGator India, SiteGround, and local providers like ResellerClub. Look for features like one-click WordPress installation, reliable customer support (ideally with local language support), and good uptime. I’ve personally used several hosting providers over the years, and finding one with responsive support is invaluable, especially when you’re just starting.
- Purchase Your Domain and Hosting: Once you’ve chosen a domain name and hosting provider, you’ll need to purchase them. Many hosting providers offer to register a domain name for you when you sign up for a hosting plan, which can simplify the process.
Step 2: Install WordPress (Setting Up Your Website Platform)
Shopping ad

- Read Before You Buy — No Video Output: These adapters support charging and USB 2.0 data transfer, but cannot transmit video signals. Except for standard USB webcams (which use USB data only), they are not compatible with HDMI/DisplayPort cables, video-capable USB-C hubs, or docking stations with video output.
- Convert USB-A Ports to USB-C: Designed to connect USB-C earphones, cables, flash drives, card readers, and other USB-C accessories to standard USB-A ports. Plug-and-play with no drivers or software required.
- Aluminum Alloy Housing: Built with a sturdy aluminum alloy shell that aids in heat dissipation and protects against daily wear and scratches. Designed to maintain a stable and secure connection.
- Compact & Travel-Friendly: The ultra-compact design allows the adapter to stay plugged into your device without blocking adjacent ports or adding bulk, reducing wear and tear on your original USB ports.
- 12-Month Warranty: Backed by a 12-month manufacturer warranty for peace of mind. Designed to meet strict quality control standards for reliable everyday performance.
Most reputable hosting providers offer a one-click WordPress installation feature, which makes this step incredibly easy for beginners in India in April 2025. Here’s a general idea of how it works:
- Log in to your hosting account control panel (often cPanel or a similar interface provided by your hosting provider).
- Look for a section labeled “WordPress,” “One-Click Installs,” “Software,” or similar.
- Click on the WordPress installer icon or link.
- Follow the on-screen instructions. You’ll typically need to provide information like your desired website title, a username and password for your WordPress admin area, and the domain name where you want to install WordPress.
- Click “Install.”
The hosting provider will then automatically set up WordPress for you. Once the installation is complete, you’ll usually receive an email with your login details for your WordPress admin area.
Alternatively, you can manually install WordPress, although this is a bit more technical. You would download the WordPress software from WordPress.org, create a database on your hosting server, upload the WordPress files using an FTP client, and then run the WordPress installation script through your web browser. For most beginners in India, the one-click installation is the recommended and easiest method.
Shopping ad

- 5-in-1 USB-C Hub: Experience comprehensive connectivity featuring a Power Delivery input, two USB-A 2.0 ports, a USB-A 3.0 port, and an HDMI port. (Note: The USB-C power delivery input port is only for connecting an external wall charger to power your laptop and cannot power peripheral devices.)
- 90W Pass-Through Charging: Achieve optimal charging with 90W pass-through power to your laptop, supported by a total input of 100W, with the hub reserving 10W for operational efficiency. (Note: Wall charger not included.)
- Quick Data Transfers: Accelerate your productivity with rapid data transfers using a high-speed 5Gbps USB 3.0 port and two 480Mbps USB 2.0 ports.
- 4K HDMI Display: Enhance your visual experience with a hub capable of delivering 4K resolution at 30Hz in both mirror and extend modes. Please note that this hub is compatible with MacBook (macOS 12 and newer), Windows 10 and 11, ChromeOS, and laptops equipped with DP Alt Mode and Power Delivery. Note: This device is not compatible with Linux.
- What You Get: Anker USB-C Hub (5-in-1, 4K HDMI), welcome guide, 18-month warranty, and our friendly customer service.
Step 3: Getting Familiar with the WordPress Dashboard
Once WordPress is installed, you can access your website’s backend, known as the WordPress dashboard, by going to yourdomain.com/wp-admin (replace yourdomain.com with your actual domain name) and logging in with the username and password you created during the installation.
Take some time to explore the different sections of the dashboard, which is your central control panel for managing your website in April 2025:
Shopping ad

- Sleek 7-in-1 USB-C Hub: Features an HDMI port, two USB-A 3.0 ports, and a USB-C data port, each providing 5Gbps transfer speeds. It also includes a USB-C PD input port for charging up to 100W and dual SD and TF card slots, all in a compact design.
- Flawless 4K@60Hz Video with HDMI: Delivers exceptional clarity and smoothness with its 4K@60Hz HDMI port, making it ideal for high-definition presentations and entertainment. (Note: Only the HDMI port supports video projection; the USB-C port is for data transfer only.)
- Double Up on Efficiency: The two USB-A 3.0 ports and a USB-C port support a fast 5Gbps data rate, significantly boosting your transfer speeds and improving productivity.
- Fast and Reliable 85W Charging: Offers high-capacity, speedy charging for laptops up to 85W, so you spend less time tethered to an outlet and more time being productive.
- What You Get: Anker USB-C Hub (7-in-1), welcome guide, 18-month warranty, and our friendly customer service.
- Posts: Where you’ll create and manage blog posts or articles.
- Media: Your library for storing images, videos, and other media files you upload to your website.
- Pages: Used for static content like your “About Us,” “Contact Us,” or “Services” pages.
- Comments: Where you can manage comments left by visitors on your posts.
- Appearance: This section allows you to manage your website’s design through themes and customize its look and feel.
- Plugins: Extend the functionality of your WordPress website by installing plugins for various features.
- Users: Manage user accounts for your website (if you have multiple contributors).
- Tools: Contains various utilities for managing your WordPress site.
- Settings: Configure various aspects of your WordPress website, such as the site title, tagline, time zone, and permalinks (the structure of your website’s URLs – I always recommend setting this to “Post name” for better SEO).
Step 4: Choosing and Installing a Theme
A WordPress theme controls the visual design of your website. There are thousands of free and premium themes available that cater to various website types and industries in India in April 2025.
- Browse Themes: In your WordPress dashboard, go to Appearance > Themes. You’ll see a few default themes installed. Click on the “Add New” button to browse more themes from the official WordPress.org theme directory. You can filter themes by popular, latest, features, and subject (consider themes relevant to businesses or topics popular in India). I’ve spent hours exploring different themes to find the perfect fit for various projects.
- Preview Themes: Before installing a theme, you can preview it to see how it would look with some sample content.
- Install a Theme: Once you find a theme you like, click the “Install” button.
- Activate a Theme: After installation, click the “Activate” button to make the theme live on your website.
For beginners in India, I often recommend starting with a lightweight and versatile theme like Astra, OceanWP, or GeneratePress, as these offer a good foundation, are highly customizable, and have good support resources available.
Recommended Free Tools
Step 5: Installing Essential Plugins
WordPress plugins are like apps for your website. They add extra features and functionality without requiring you to write any code. There are plugins for almost anything you can imagine, from contact forms to SEO optimization, and many are specifically relevant to the Indian market (e.g., payment gateways popular in India).
Shopping ad

- Dual Converters, Infinite Potential:Includes 2× USB C male to USB A female adapters and 2× USB A male to USB C female adapters. Perfect for a wide range of uses—tablets with Bluetooth keyboards, expand USB ports on macbook, and more. Two different converters for all your daily needs
- Next-Level 10Gbps & 3A Charging: No more slow 480Mbps, this usb to usb c adapter has a transfer speed of up to 10Gbps, allowing you to do more transferring in less time. This usb adapter fits both USB A and USB C charger, supporting up to 3A fast charging
- Upgraded Exquisite Craftsmanship: With an aluminum alloy housing and metal connector, the usbc to usb adapter is extremely durable and sturdy. Rigorously tested to withstand more than 10,000 times of plugging and unplugging, ensuring long-lasting performance
- Broad Compatible: The usb c to usb adapter widely supports all USB C/ USB A devices like laptops, tablets, cellphones, car chargers, and phone chargers. Such as compatible with MacBook Pro/Air 2023/2022, Thunderbolt 4/3 Devices,Apple MagSafe Watch 9/8/7/SE/Ultra, iPad Pro 2022/2021, Samsung Galaxy S23/S20/S10, and iPhone 17/16/15 Pro. Plug and play
- Please Note: To reach 10Gbps speed, keep the cable under 3.3 ft. For USB A Male to USB C adapters, try flipping the USB C connector. USB C Male to USB A adapters support bidirectional 10Gbps transfer within 3.3 ft
- Browse Plugins: In your WordPress dashboard, go to Plugins > Add New. You can search for plugins based on keywords or browse popular and recommended plugins.
- Install a Plugin: Once you find a plugin you want to use, click the “Install Now” button.
- Activate a Plugin: After installation, click the “Activate” button to enable the plugin.
Some essential plugins that I often recommend for a new website in India in April 2025 include:
- Yoast SEO or Rank Math: For optimizing your website for search engines like Google (consider targeting keywords relevant to India).
- Contact Form 7 or WPForms: To create contact forms for your website so visitors can easily reach you.
- Akismet Anti-Spam: To help prevent comment spam on your blog posts.
- UpdraftPlus or BackupBuddy: For backing up your website regularly – this is crucial!
- A security plugin like Wordfence or Sucuri Security: To protect your website from malware and other security threats.
- Payment gateway plugins (e.g., Razorpay, PayU Money): If you plan to sell products or services online in India.
Step 6: Creating Your Website Content
Now for the most important part – adding your content!
- Create Pages: Go to Pages > Add New to create static pages like your homepage, about us page, contact page, services page, etc. Use the WordPress editor (Gutenberg) to add text, images, and other media. I always advise starting with a clear structure for your key pages.
- Write Blog Posts: If you plan to have a blog section for sharing news, articles, or updates relevant to your audience in India, go to Posts > Add New to create blog posts. You can categorize and tag your posts to organize them.
- Organize Your Content with Menus: Use menus to help visitors navigate your website. Go to Appearance > Menus to create and manage your website’s navigation menus. You can add pages, posts, and custom links to your menus.
The WordPress editor (Gutenberg) uses blocks to create content. You can add various types of blocks, such as paragraphs, headings, images, videos, lists, and more. Explore the different block options to create engaging content relevant to your audience in India.
Quick wins for a faster PC:
Clear out junk files and repair common Windows errorsFree Scan →Fix the driver behind crashes, sound loss and screen glitchesFind Drivers →Shopping ad

- 5-in-1 Connectivity: Equipped with a 4K HDMI port, a 5 Gbps USB-C data port, two 5 Gbps USB-A ports, and a USB C 100W PD-IN port. Note: The USB C 100W PD-IN port supports only charging and does not support data transfer devices such as headphones or speakers.
- Powerful Pass-Through Charging: Supports up to 85W pass-through charging so you can power up your laptop while you use the hub. Note: Pass-through charging requires a charger (not included). Note: To achieve full power for iPad, we recommend using a 45W wall charger.
- Transfer Files in Seconds: Move files to and from your laptop at speeds of up to 5 Gbps via the USB-C and USB-A data ports. Note: The USB C 5Gbps Data port does not support video output.
- HD Display: Connect to the HDMI port to stream or mirror content to an external monitor in resolutions of up to 4K@30Hz. Note: The USB-C ports do not support video output.
- What You Get: Anker 332 USB-C Hub (5-in-1), welcome guide, our worry-free 18-month warranty, and friendly customer service.
Step 7: Customizing Your Website’s Appearance
Most themes offer customization options that allow you to change things like colors, fonts, layouts, and more to match your brand identity in India.
- Go to Appearance > Customize in your WordPress dashboard. This will open the WordPress Customizer, where you can see live previews of your changes.
- Explore the different customization options available for your theme. These options will vary depending on the theme you’ve chosen.
Step 8: Testing and Launching Your Website
Before making your website public, thoroughly test it on different devices (desktops, laptops, smartphones common in India) and browsers to ensure everything looks and functions correctly.
- Check all your pages and posts.
- Test your contact forms.
- Make sure your navigation menus are working correctly.
- Check for any broken links or images.
Once you’re satisfied with your website, it’s time to launch it! Your website should now be accessible to the world through your domain name. Promote your new website to your network and potential customers in India!
My Personal Take on Building Websites with WordPress
I’ve personally used WordPress for countless projects, from personal blogs to business websites catering to audiences in India. Its flexibility, ease of use, and vast ecosystem of themes and plugins make it an incredibly powerful platform for anyone looking to establish an online presence. While the initial setup might seem like a few steps, each one is manageable, and the result – your own website – is well worth the effort. Don’t hesitate to explore the many resources available online and in the WordPress community in India if you need help along the way. Building a website with WordPress in April 2025 for beginners in India is an achievable goal. By following these steps carefully, you’ll be well on your way to creating your own corner of the internet.
More shopping ads
Product prices and availability are accurate as of the date/time indicated and are subject to change. Any price and availability information displayed on Amazon at the time of purchase will apply.
Independent reader supportYour contribution helps us test, update, and keep practical guides available for everyone.