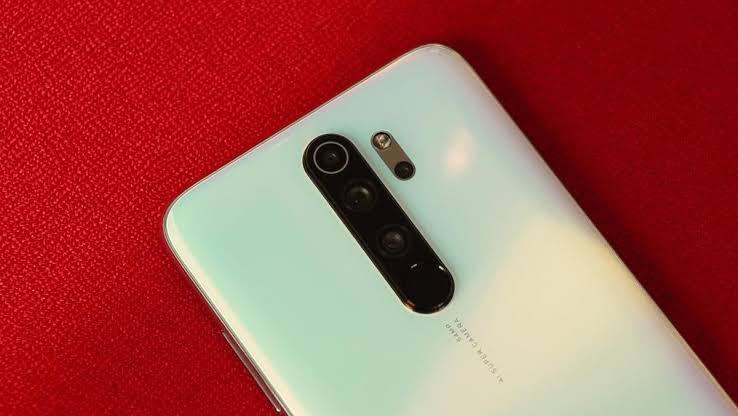
When Xiaomi launched Redmi Note 8, it impressed everyone with its top-notch specs but a relatively low price point. It also includes 48 mp primary rear cam, eight mp ultra-wide lens and a two mp macro camera which makes it an incredibly powerful shooter. However, if you want to shoot an even better quality picture, you need to install Gcam mod on your Redmi Note 8.
Gcam or the Google Camera app was initially developed and optimised for the Pixel range of phones. It was later modded to work on various phones. Similarly, you can install the Google Camera or Gcam app on Redmi Note 8.

Which Google Camera mod you should install?
1] Gcam version 6: It came with Pixel 3.and is a better all-round performer. It can shoot superior selfie shots even though picture shot with the rear cam are just amazing. Unfortunately, Night Mode does not work with Gcam 6, which means there is some compromise to be made.
You can download from version 6 here.
2] Gcam version 7: You can also go for the latest Gcam version 7, which accompanies the new Pixel 4, but it has been found to lack in performance on a few fronts.
For instance, with Gcam 7, selfie shots aren’t anything special compared to what the Mi Note 8’s stock camera is capable. But then, the Google Camera version 7 supports Night Sight, which again is way superior to what the Note 8’s stock camera can pull off.
The best part is that you can install both the versions and use them appropriately.
You can download from version 7 here.
How to install Google Camera mod or Gcam on Redmi Note 8
The steps are easy to follow, and you do not need to root Redmi Note 8 to install Google Camera APK.
- Enable Developer Mode
- Download the Google Camera APK on phone storage & Install them
- Setting up Google Camera APK on Redmi Note 8
Note: You cannot install Google Camera mode on Redmi Note 8 Pro because it carries a MediaTek processor. As of now, Google Camera or GCam works only on Snapdragon processors.
1] Enable Developer Mode in Redmi Note 8
- Open Settings and navigate to My device > MIUI version.
- Tap on the MIUI version for seven times in a row to invoke Developer mode.
- Enter your Phone PIN for authentication purposes.
Once you have done that, the Developer mode has been enabled on your device. There is going to be a message flashed below reading— You are now a developer.
The next step is to enable USB debugging mode for the Google Camera app to work correctly on Redmi Note 8.
- Go to Settings > Additional Settings > Developer options.
- In the Developer options page, scroll down and click on USB debugging.
- Toggle the switch on.
With this done, the next step for you to do will be to download the two apk files. The links have been mentioned above. Make sure to download the APK on phone storage.
Once the download is complete, tap on each of them to install. You may be warned about installing an app from a third-party source, allow it to do so.
3] Setting up Google Camera APK on Redmi Note 8
Once you install the files, you will need to set up a few things so it can work on the phone.
- Open the Google Camera app (Google APK 6)
- There are going to be several pop-ups seeking your permission for using the camera hardware, storage and such. Consent to such as you will need those eventually.
- Next, when the camera app launches, tap on Mode > Settings.
- In the Settings page, tap on the HDR+ enhanced Auto White Balance from Pixel 2 or Pixel 3. Turn it off.
- Next tap on Advanced > Base > Config. Here the default is set at Auto.
- Change it to Pixel2018 ZsIR Hdr+. It’s the third option from the bottom.
- Under Base, next tap on Front camera.
- The default is set at Pixel 3. Change to Nexus 6P.
- Under Advanced, tap on Libs and set it to Xlib 2.3. It will ensure your images have better shadow effects and look more life-like.
- With this done, you are now ready to use your Gcam on the Mi Note 8.
Google Camera version 7 doesn’t need any change in settings. All that you need to do is launch the camera, tap on Mode and select Night Sight from the options provided. You should now be ready to shoot good quality images, even in low light conditions.
An important point to note is that the Gcam mode will only be able to wield its magic on the 48 mp primary camera. Also, it will not be able to draw on the secondary wide-angle lens or the telephoto lens.
So, there you have it. Choose either Gcam modes and shoot images both in well lit or dimly lit conditions. Take selfie shots as well and see the difference compared to what the stock camera on the Mi Note 8 is capable.