Those were the old days when we used to save specific messages or links to keep notes of them or to keep the memories. But now things have changed, we just screenshot them. But taking a screenshot is a little tricky on iOS devices like an iPad or an iPhone. You have to try it a few times to master it. Anyways, this article guides you to take a screenshot in your Apple mobile device.
How to take a Screenshot on iPhone and iPad
- Open the window that you want to capture.
- Organize everything you want to include in your screenshot.
- Use the hardware key combination to capture the screenshot.
These are the steps to take a screenshot in your Apple device. However, it is not the same for all Apple iPhone. For example, the new generation iPhone devices like iPhone X, iPhone XS, iPhone XS Max, and iPhone XR has a standard method to take the screenshot. At the same time, older devices like iPhone 8 and earlier have a completely different approach to capture the screenshot.
How to take a screenshot in iPhone X, iPhone XS, iPhone XS Max, and iPhone XR
As mentioned above, iPhone X, iPhone XS, iPhone XS Max, and iPhone XR devices have a standard method to capture the screenshot. These devices don’t have a physical home button, and it is a reason to use a non-traditional iPhone screenshot system. Follow the steps below:
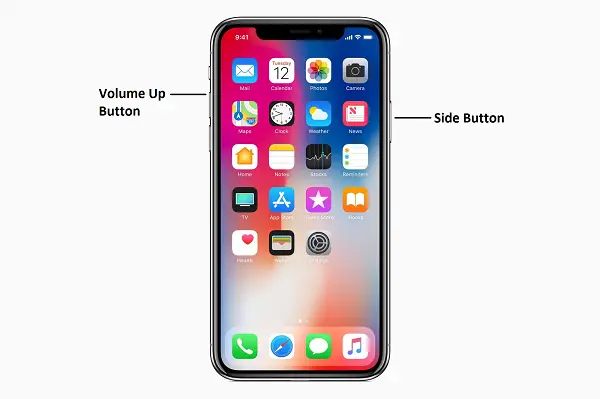
- Open the screen that you want to capture and organize the screen as you want it on the screenshot image.
- Press and hold the Side button on the right side of the device.
- Along with the side button, press the Volume Up button simultaneously to trigger the screenshot action.
- That’s it; now the screen will flash with a shutter sound. The screenshot will be available at Photos app automatically.
How to take a screenshot in iPhone 8 or earlier devices
The older iPhones have a very different method of capturing a screenshot. Because the devices ranging from the original iPhone to the iPhone 8 Plus feature a physical home button. Therefore, it uses the traditional screenshot method. Anyways, follow the steps below.
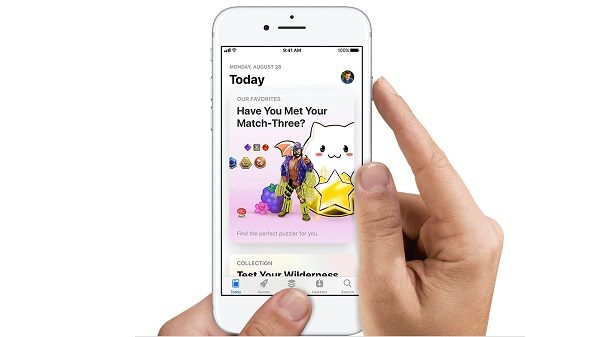
- Open the screen that you want to capture and organize the screen as you want it on the screenshot image.
- Press and hold on the Power button and the home button simultaneously. Do it simultaneously to avoid the accidental triggering of the Siri or Touch ID.
- Now the screen will flash once, and the screenshot will be available in your device. These devices also have a shutter sound while capturing the screenshots.
Now open the “Photos” application on your device, and you will find your screenshot there. If you are using the iOS 10 or earlier, the screenshot will be available in your All Photos album. If you are not using the iCloud Photo Library, you can find them in the Camera Roll.
