In last tutorial, we learned how to add Textboxes and other stuff to our form. Now we are about to learn something about properties box present on right corner. This property box changes its attributes depending on your selection.
Let’s begin our study with form. You can select form by clicking anywhere on grayish surface of form and not Textbox or Label. Sizing handles appearing around form indicates form selection. Now check properties box. If its saying “Textbox1 Textbox” or “Label1 Label”, you haven’t selected form properly. Your properties box must say “Form1 Form”. It shows properties categorized under different headings like Accessibility, Appearance and so on.

To the left in list is property name and to its right is property value. Each property has specific value determining behavior or appearance of that particular property. These values are dynamic and can be set according to our requirements. For exploring in easiest way, align properties alphabetically by clicking on icon shown in image below.

Now locate Text property in list and check its default value; it is set to “Form1”. Do not get confused with what does this mean. It simply means that Text property is set to Form1. Let us change default value to understand what Text property does. Click on “Form1” value and change it to “My First Form” and hit enter/return key.

Your form should look like this one now:

Notice the change on the upper strip of the form which has “My First Form” written in black on sky blue strip. So, Text property is used to display caption of the particular object. Now we will change text property of labels and Textbox. For changing properties of form, we selected form first. In similar way, we have to select label first to change its properties. After selecting label, your property box will look like this:

There are some different properties for labels from form but some properties like Text works in similar fashion. Locate Text property of Label 1 and change it to “First Name”. In similar way, change text property of Label 2 and Label 3 to “Last Name” and “Contact No.” respectively.

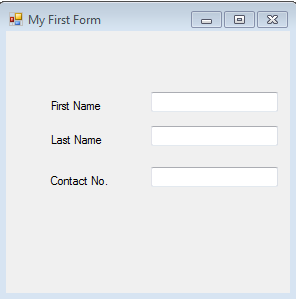
Your modified form must look like this:

You must have got till now that we can change “display name” of any controller with help of Text property. But what does this property do to Textbox? We will learn about it in detail in next few tutorials. But before that we will learn something regarding changes that we can make to look our form more attractive. More is about come soon through next tutorial, so stay tuned with us!
For any queries/difficulties you have so far, feel free to leave comment!


2 Comments